
Go Jewish GO! is an Augmented Reality (AR) application that will soon be available in the Apple Store (for iPhone smartphones) and in the Google Play Store (for Android smartphones):


While waiting for it to be published in the stores, the app can be downloaded directly from this site.
What are the necessary hardware requirements?
To function correctly, the application requires a camera, a GPS geolocation system (navigator) and an accelerometer (gyroscope).
Installation instructions
The installation procedure is more elaborate than for digital stores, but it allows the app to work even on older Android devices.
(version dated 30/03/2025 – If you are updating the application to a more recent version, it is always advisable to uninstall the previous version before installing the more up-to-date one)
When you click on the button, you will be asked for the path where you want to download the gjg.apk installation file. Usually this corresponds to the Downloads folder.
Once you have downloaded the installation file (gjg.apk) and clicked on it (from the notifications menu or from the folder where the installation file is located) you will be asked to enable the ‘Install Unknown Apps’ option, which is disabled by default for security reasons. Essentially we are allowing the browser to install applications with the user’s authorisation.
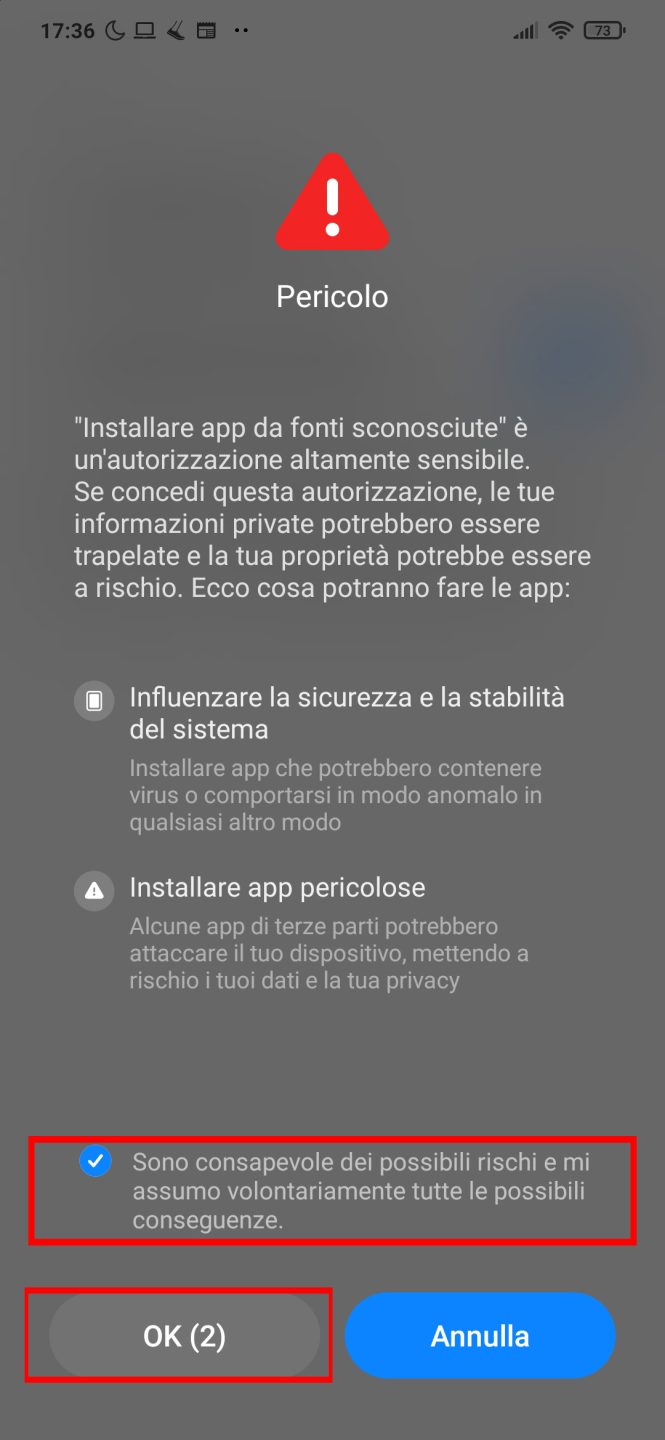
After displaying a warning about the possible risks of installing malicious applications from the web, the most recent versions of Android direct the user to the interface on the screen Install unknown apps or to an intermediate screen called Special Access.
Install Unknown Apps
In the first case (Install unknown apps) you are simply required to activate the Allow from this source option. As follows:


Once the installation procedure is finished, make sure that the permissions Camera and for the Location are enabled. Proceed here.
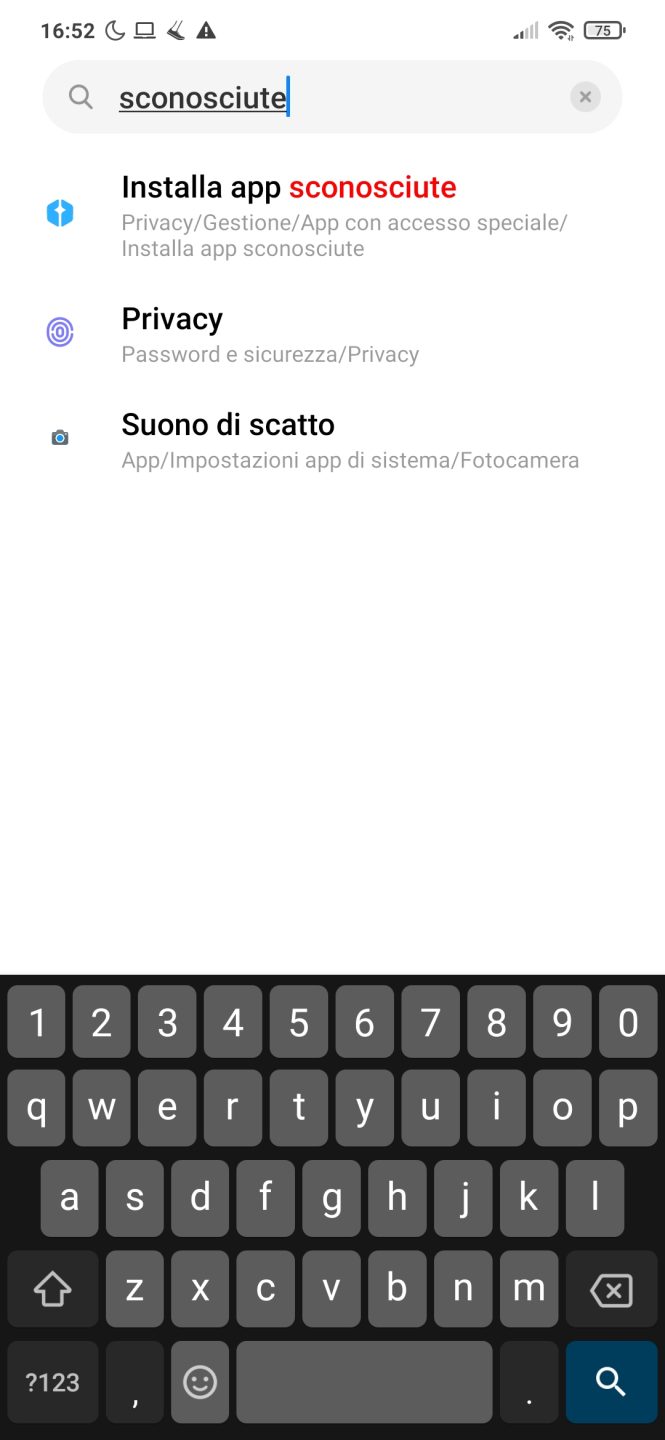
Manual setting search
If you are not directed to any screen, remember that Android allows you to search for options within the Settings menu. Once you have entered the smartphone Settings, the search field is usually located at the top of the interface (in the screenshot below: ‘Search in Settings’).

From here, proceed with the installation of the application, either installing it from the path where it was saved (typically the Downloads folder) or re-downloading it from this page and restarting the installation.
Once the installation procedure is finished, make sure that the permissions for Camera and Location are enabled. Proceed here.
Install unknown apps / Special Access
If instead you are directed to (or you reach it yourself) a screen Install unknown apps (sometimes called Special Access) where all the applications installed on the device are listed, you will need to select the one for which you would like to grant permission to download and install applications that don’t come from the official store. In our case we would like it to be the browser we are using to surf the web, be it Chrome, Firefox, Opera or simply Browser.
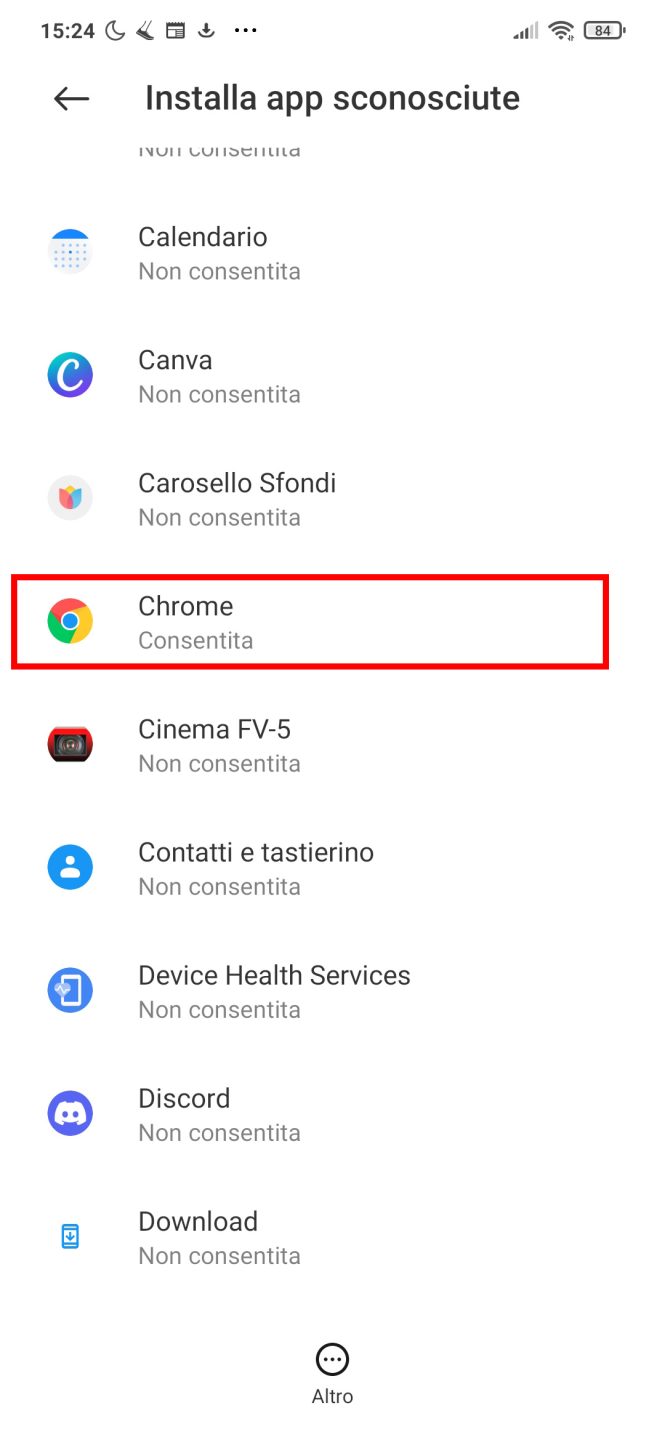
Remembering that every smartphone manufacturer arranges the operating system interface with small variations and that the option can be called (Install from Unknown Sources, Install Unknown Apps, Special Access) and can be arranged as an item in a different menu within the interface, the invitation is to search among the options ‘Privacy’, ‘Security’, ‘ Biometric data and security, Developer options.
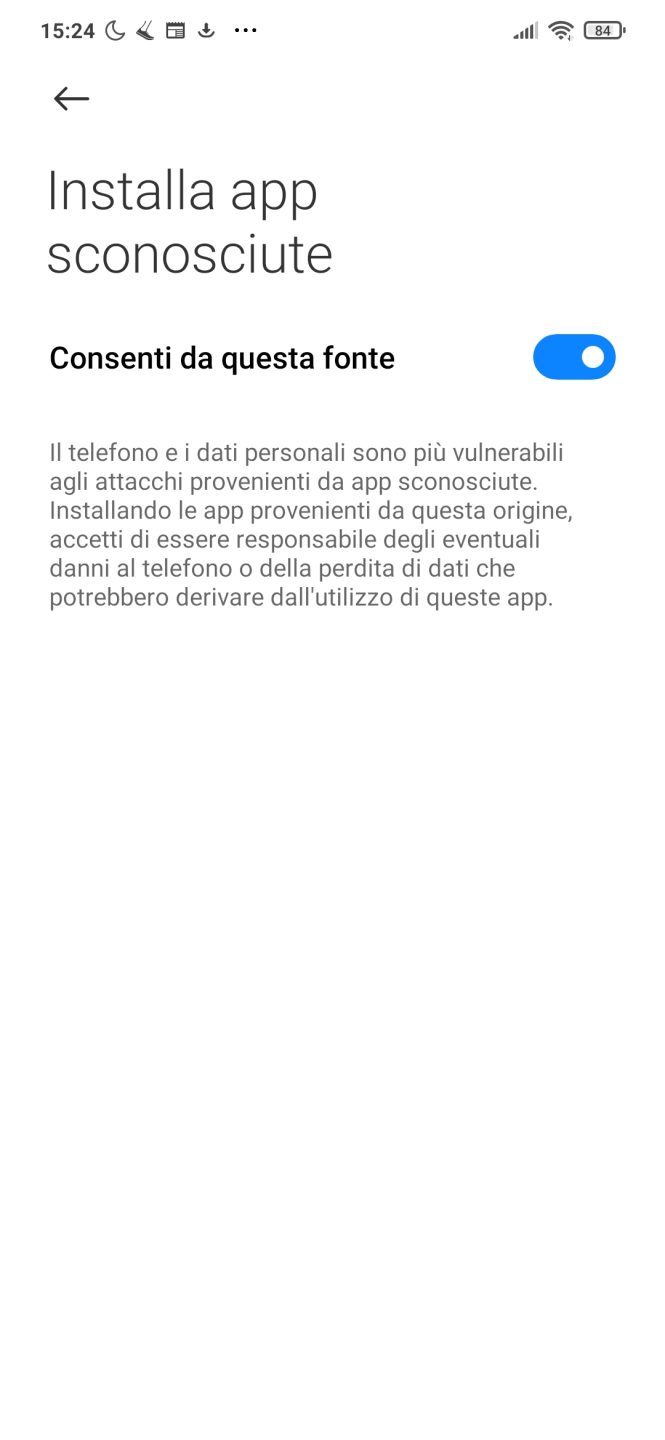
Once the installation is complete, the Install unknown apps option can be disabled again. For the app to work properly, make sure that Camera and Location permissions are granted. Proceed here.
What user licences does the application require? How are they activated?
The following procedure is only necessary if you are installing the app from this site.
The application requires permission to use the camera to frame points of interest (POI) and permission to identify the user’s location to represent it on a map and find the nearest points of interest.
No access is made to the user’s personal data in memory, nor is sensitive data such as location or what is framed saved.
The only data stored is that relating to the language options.
Again, let’s go back to the Settings menu on our device and search for the ‘Apps’ or ‘Manage Apps’ option using the search bar at the top.
Search for ‘apps’ in the settings search bar and press ‘Manage Apps’ or ‘Apps’
At this point the list of apps installed on your device will appear. Using the search bar, search for ‘gjg’ or ‘Go Jewish GO!’
We will find ourselves in front of the ‘Go Jewish GO!’ app information. Select App permissions
As we can see, Camera and Location are automatically set to ‘Not authorised’, let’s enable them individually with a tap…
In Camera, click on ‘Allow only while app is in use’…
…and the same for the Authorisation Position.
We can finally launch the app Go Jewish GO!
Projekt von
Jüdische Gemeinde Triest und Universität Ca‘ Foscari Venedig
Für Informationen
visit@triestebraica.it